
OIL PAN
EM-79prose procedureAluminum oil pan bolt tightening sequence differs between 2WD and 4WD models. Step 5 A/T only; step 6 2WD only.
Installation (Cont'd)
IMPORTANT
Be sure liquid gasket is 4.0 to 5.0 mm (0.157 to 0.197 in) wide.
Attaching should be done within 5 minutes after coating.
Installation (Cont'd)
- 1(3) Install aluminum oil pan. Install bolts in the reverse order of removal.No.1 - No.16 bolts: 16 - 19 N·m (1.6 - 1.9 kg-m, 12 - 14 ft-lb)No.17, No.18 bolts: 6.4 - 7.5 N·m (0.65 - 0.76 kg-m, 4.7 - 5.5 ft-lb)
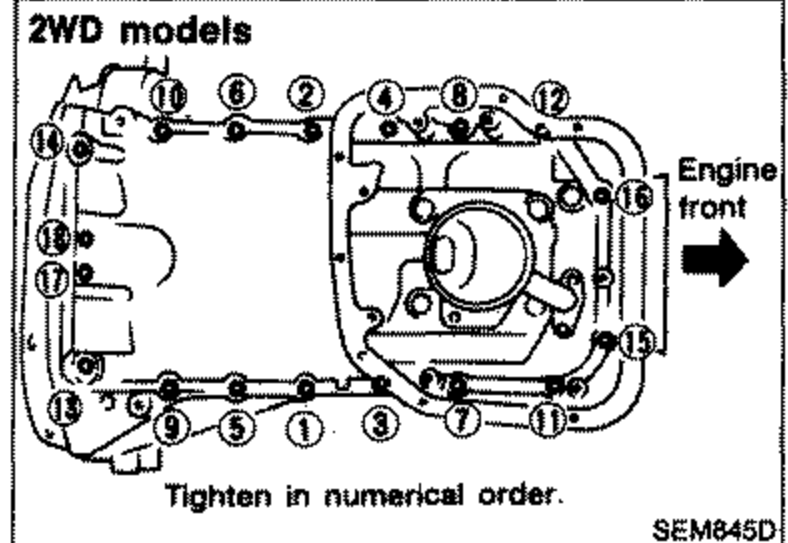 SEM845D
 - 2Install the two engine to transaxle bolts.
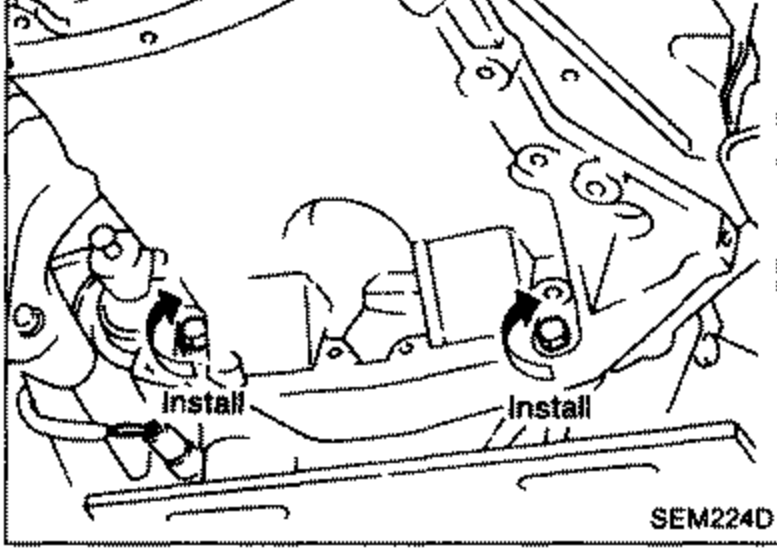 SEM224D
 - 3Install rear cover plate.
- 4Install compressor gussets.
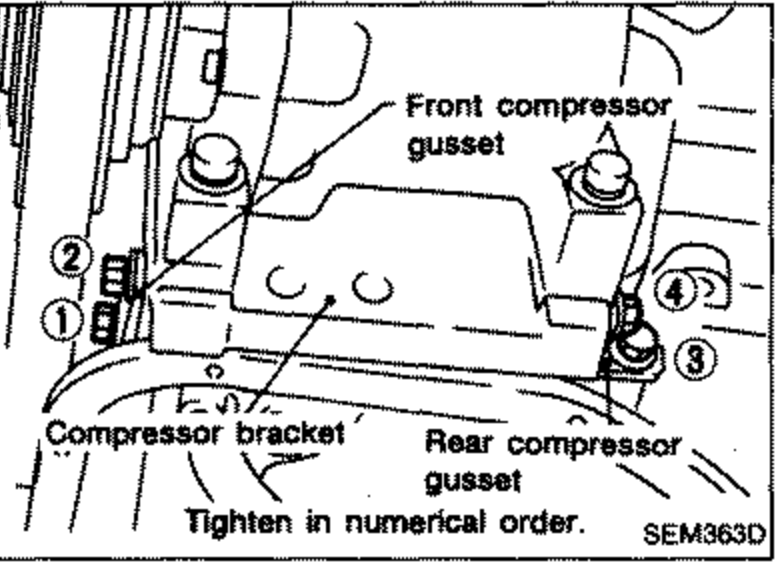 SEM363D
 - 5Install A/T shift control cable. (A/T only)
- 6Install center member. (2WD only)
- 7Install front tube.
- 8Install baffle plate.
| Specification | Value |
|---|---|
| Aluminum oil pan bolts No.1 - No.16tightening torque | 16 - 19N·m (1.6 - 1.9 kg-m, 12 - 14 ft-lb) |
| Aluminum oil pan bolts No.17, No.18tightening torque | 6.4 - 7.5N·m (0.65 - 0.76 kg-m, 4.7 - 5.5 ft-lb) |
Aluminum oil pan bolts No.1 - No.16tightening torque
16 - 19N·m (1.6 - 1.9 kg-m, 12 - 14 ft-lb)
Aluminum oil pan bolts No.17, No.18tightening torque
6.4 - 7.5N·m (0.65 - 0.76 kg-m, 4.7 - 5.5 ft-lb)