Nissan 100NX N14 silhouetteN14

OIL PAN

EM-76prose procedure

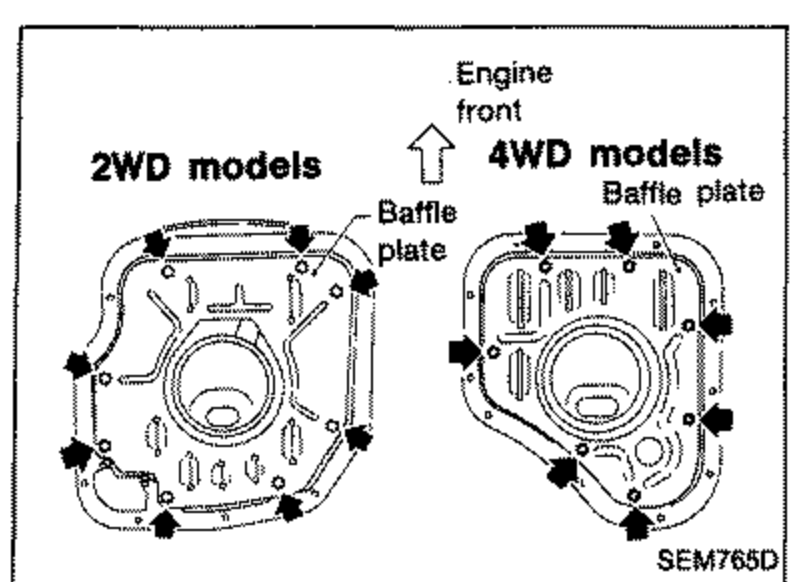
Steps 7 and 8 are 2WD only; step 9 is A/T only. Baffle plate and bolt layouts differ between 2WD and 4WD models.

Removal (Cont'd)

  1. 5
    Remove baffle plate.
    Baffle plate locations shown for '2WD models' (left) and '4WD models' (right), with bolt positions marked. An 'Engine front' arrow points up; labels point to the 'Baffle plate'.
    SEM765D
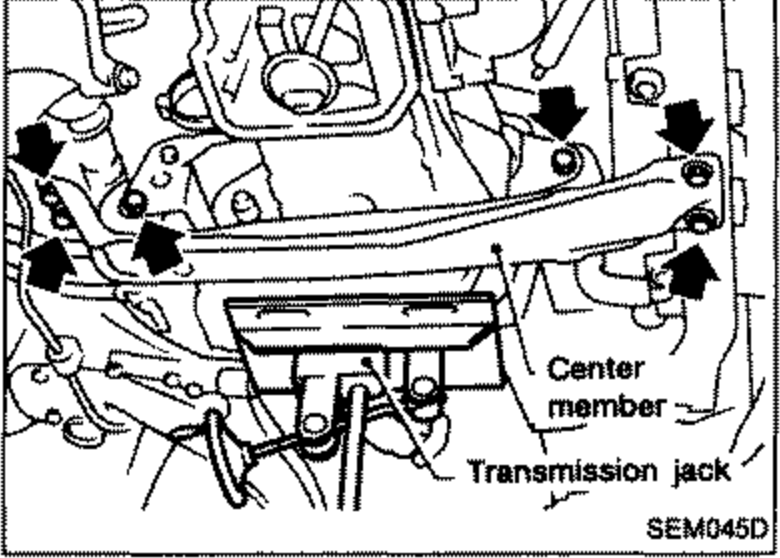
  2. 6
    Remove front tube.
    Underside view showing the front tube, center member, and a transmission jack supporting the transaxle. Arrows point to bolt locations.
    SEM045D
  3. 7
    Set a suitable transmission jack under transaxle and hoist engine with engine slinger. (2WD only)
  4. 8
    Remove center member. (2WD only)
  5. 9
    Remove A/T shift control cable. (A/T only)
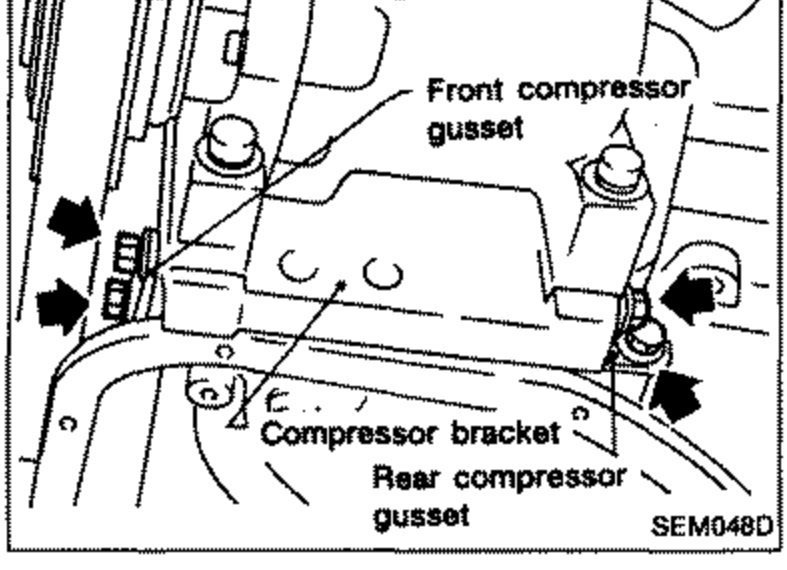
  6. 10
    Remove compressor gussets.
    Front and rear compressor gussets and the compressor bracket. Arrows point to mounting bolts.
    SEM048D
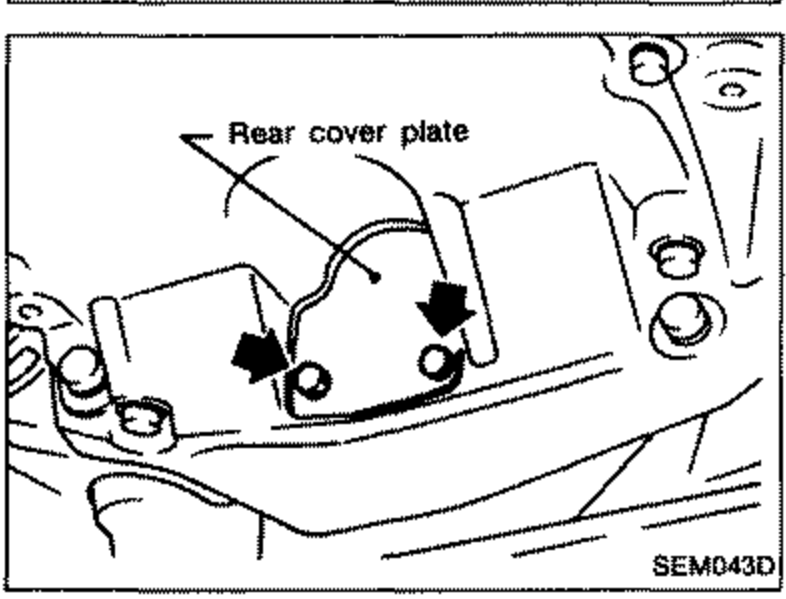
  7. 11
    Remove rear cover plate.
    Rear cover plate at the rear of the engine; arrows point to its retaining bolts.
    SEM043D
  8. 12
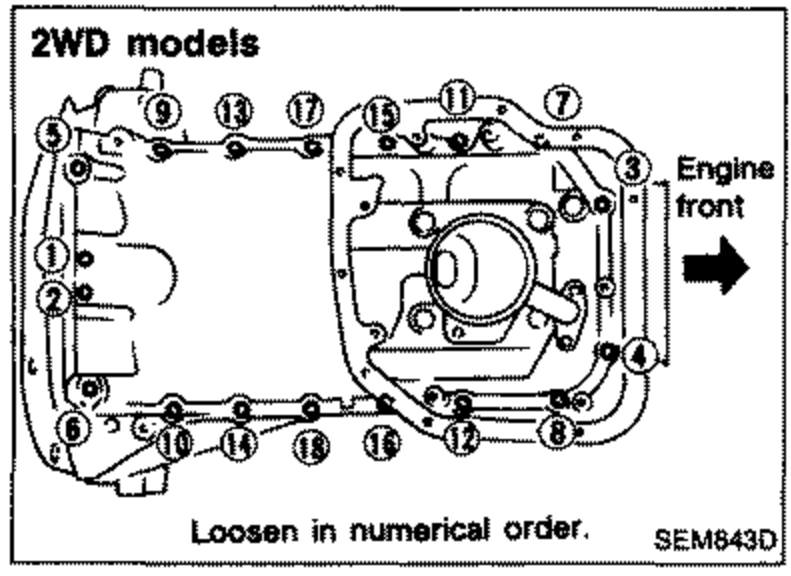
    Remove aluminum oil pan bolts.
    Aluminum oil pan bolt loosening sequence for '2WD models' with numbered bolt positions. 'Engine front' arrow points right. Note reads 'Loosen in numerical order.'
    SEM643D

Search Manual

Search pages, specs, and procedures