
Oil Pan — Installation (Cont'd)
EM-202prose procedureOil pan bolt torque differs between CD17 (5-7 N·m) and CD20 (7-8 N·m) engines.
Installation (Cont'd)
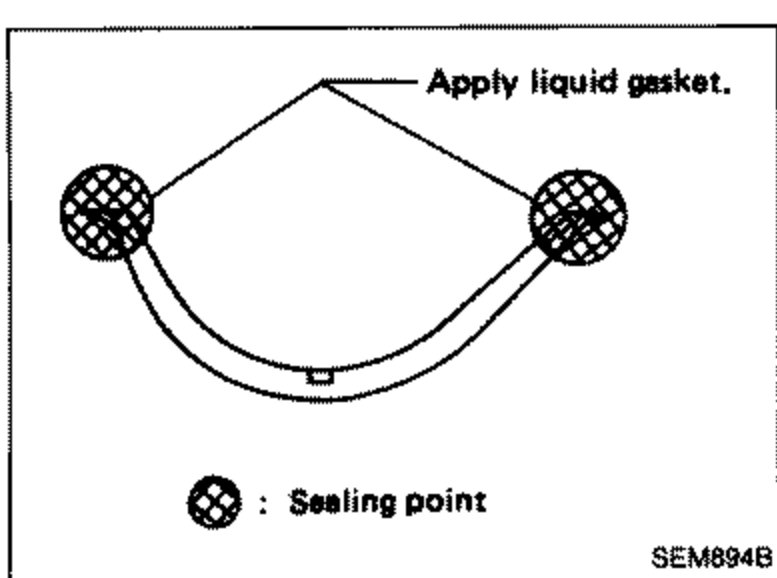
- 3Apply liquid gasket to oil pan front oil seal and rear oil seal.
 SEM894B
 - 4Apply a continuous bead of liquid gasket to mating surface of oil pan.Attaching should be done within 5 minutes after coating.
 SEM351B
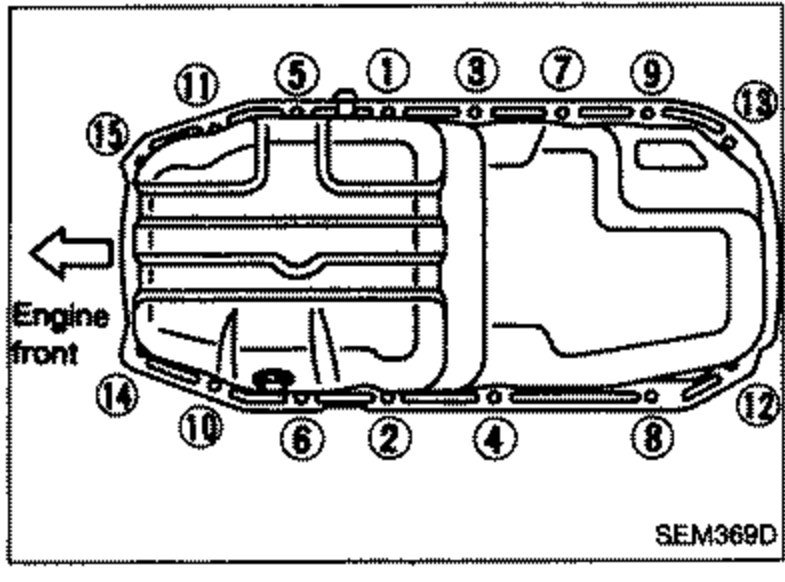
 - 5Install oil pan and tighten bolts in the order shown in the figure.Wait at least 30 minutes before refilling engine oil.
 SEM369D
| Specification | Value |
|---|---|
| Oil pan bolts (CD17)CD17 engine | 5 - 7N·m |
| Oil pan bolts (CD20)CD20 engine | 7 - 8N·m |
Oil pan bolts (CD17)CD17 engine
5 - 7N·m
Oil pan bolts (CD20)CD20 engine
7 - 8N·m