
Cylinder Block - Assembly (Cont'd)
EM-247prose procedureMain bearing beam applies to CD20.
Assembly (Cont'd)
CRANKSHAFT (Cont'd)
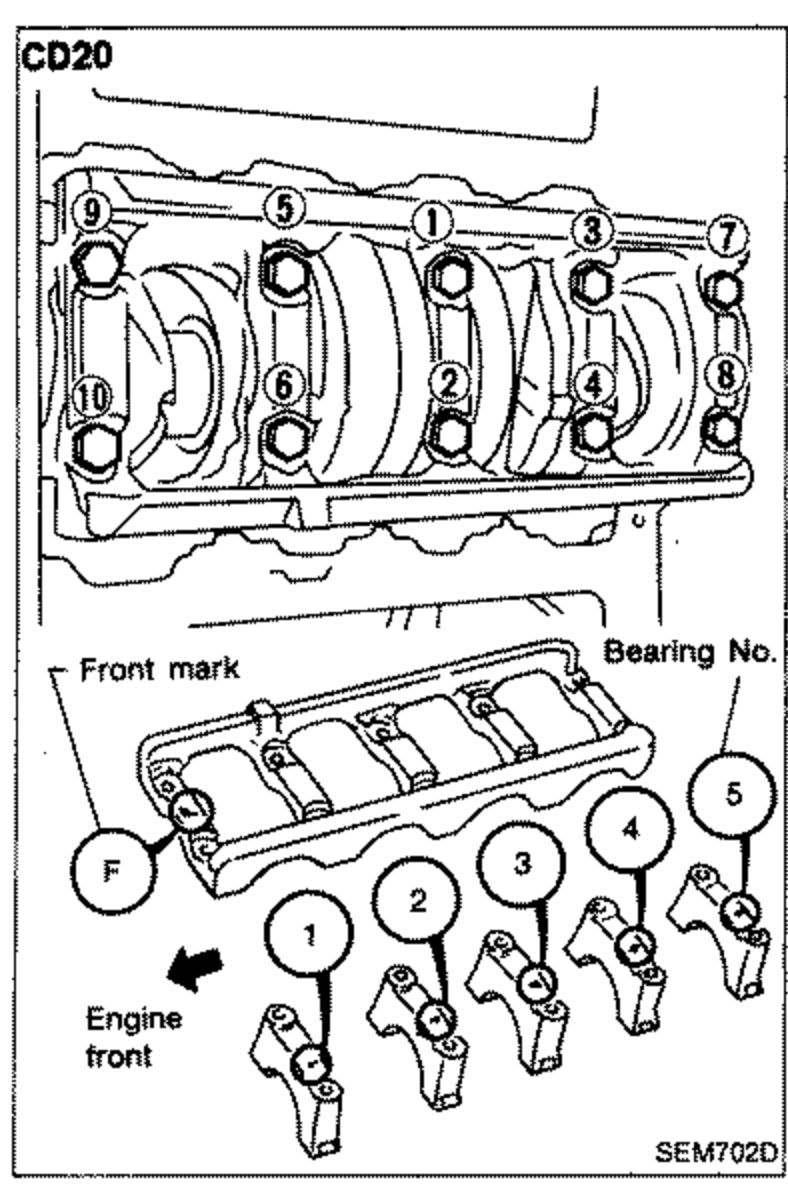
- 2Apply engine oil to main bearing surfaces on crankshaft journal side.
 SEM702D
 - 3Install crankshaft and main bearing caps and main bearing beam (CD20).Main bearing cap bolt: 44 - 54 N·m (4.5 - 5.5 kg-m, 33 - 40 ft-lb)
- 4Tighten main bearing cap bolts.Arrange the parts so that the indicated numbers on bearing caps are in a row from the front of engine.Tighten bearing cap bolts gradually in two or three stages and outwardly from center bearing in sequence.After securing bearing cap bolts, ascertain that crankshaft turns smoothly.
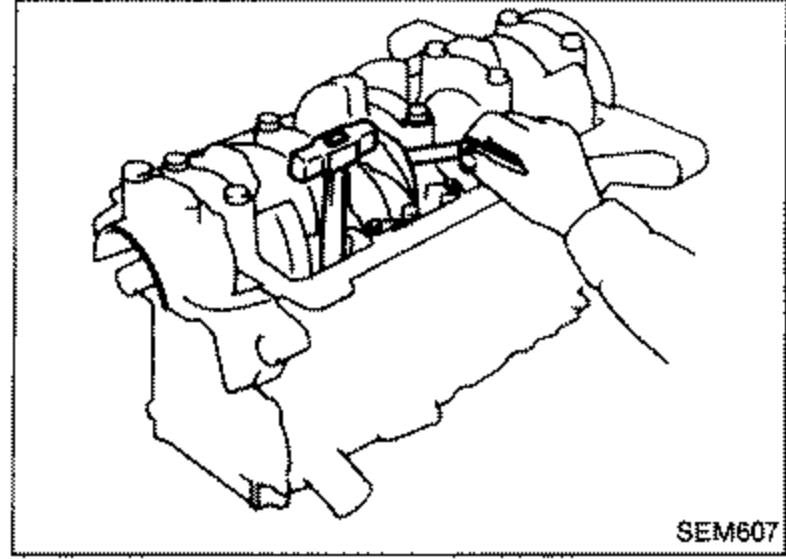
- 5Measure crankshaft free end play at center bearing.
 SEM607
| Specification | Value |
|---|---|
| Crankshaft free end play (Standard)Standard | 0.05 - 0.18mm (0.0020 - 0.0071 in) |
| Crankshaft free end play (Limit)Limit | 0.30mm (0.0118 in) |
Crankshaft free end play (Standard)Standard
0.05 - 0.18mm (0.0020 - 0.0071 in)
Crankshaft free end play (Limit)Limit
0.30mm (0.0118 in)
PISTON WITH CONNECTING ROD
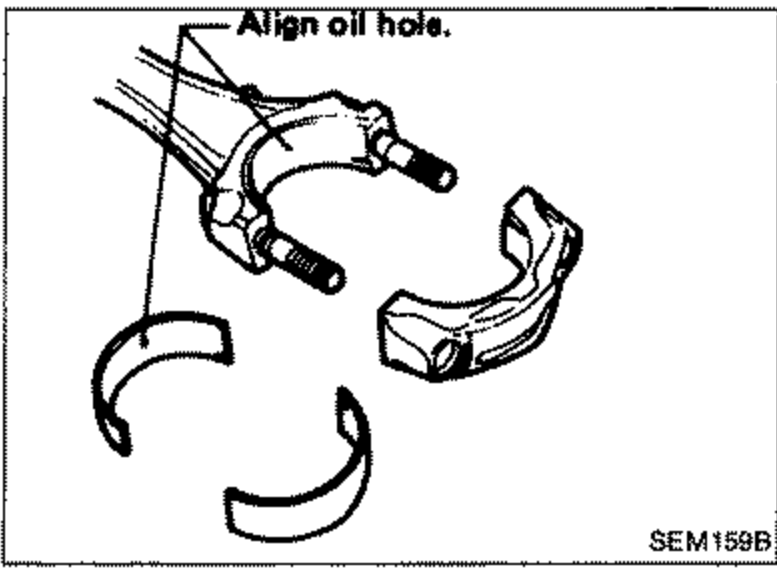
- 1Install connecting rod bearings in the connecting rods and connecting rod caps.Confirm that correct size of bearings is used. Refer to "Inspection".Install the bearings so that the oil hole in the connecting rod aligns with the oil hole of the bearing.Apply engine oil to connecting rod bearing surfaces on the crankshaft journal side.
 SEM159B
Set piston rings as shown.
See also
Inspection